
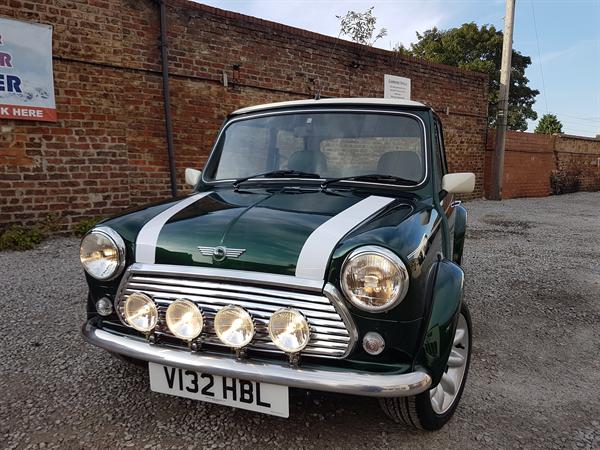
Mini Cooper - Restoration project (april 17 - aug 17)
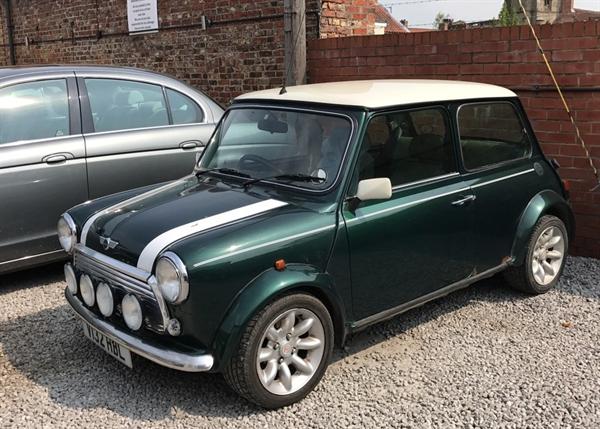
This year 2000 Rover Mini Cooper is a vehicle that we know well. It has over the years had quite a lot of maintenance, welding and repairs to keep it on the road. It started to get to the point where it was getting more and more difficult (and not cost effective) to repair due to various corrosion points that were starting to affect the structure of the vehicle.
We suggested to the customer to consider a complete restoration of the vehicle. As a lot of Minis are, it is dearly loved and quite often owners are emotionally attached to the vehicle to dispose of it. So after a lot of soul searching and weighing up options they decided that they preferred us to restore the complete car as opposed to looking for a replacement car.
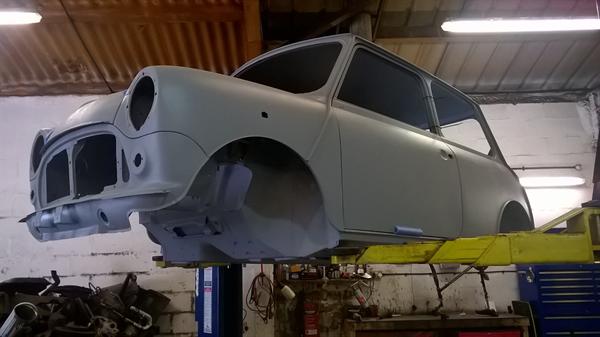
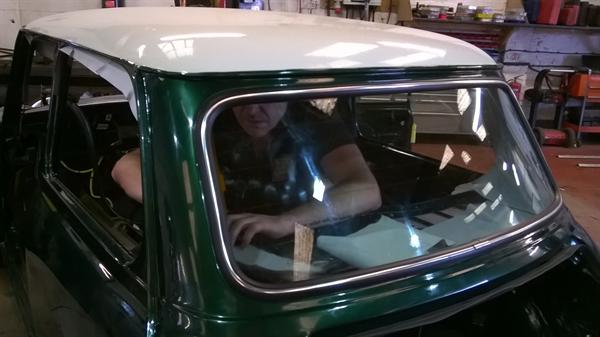
The first stage of the restoration is searching for a complete body shell. The body shells are only manufactured a few times a year and there is a waiting list for them. We managed to locate one from a cancelled order and sent over a trailer to collect it. The new shell was inspected and prepared for painting. It was sent over to our painters to be painted inside and out in it's original British Racing Green with an Old English White roof. The underside was rust-proofed with a Schutz stone proof coating.
We started by installing new premium sound proofing into the floor pan, the roof, inside all doors, inside rear panels and under the bonnet. The roof lining was renewed (this alone took almost 2 days to install)
All original parts that could be reused were put into boxes to be serviced, cleaned and painted. The parts that were too worn or corroded were disposed of and new components were ordered. All the new components were inspected and painted where required to preserve.
The underside of the Mini was painted in Schutz stone chip shield. This shield offers resistance to stone chip damage, salt and corrosion this helps to protect the vehicle underside. We also used waxoyl in all the apertures inside and out. Waxoyl is a thick waxy fluid which chases out moisture to form a flexible weather proof skin.
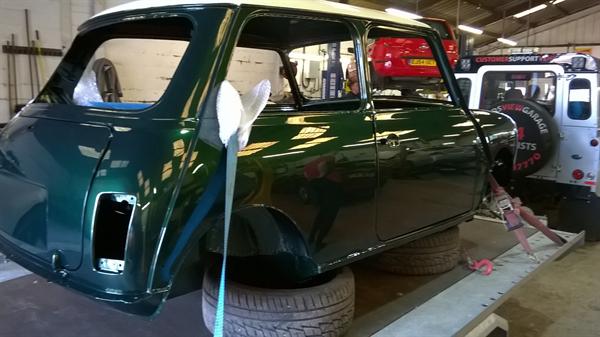
Starting from the rear end we refitted all parts that was in good conditon but before they were refitted everything was serviced either by cleaning up, greasing, painting or just washing. Every gasket and body seal was replaced on the rear to ensure that there was no water ingress inside the body of car to cause damage in the future.
All seals around doors and windows were replaced.
Every last nut and bolt was inspected, cleaned up, painted or renewed.
The engine was removed from the bay and overhauled. We replaced various gaskets and seals on the rear while it was out. The seals at the rear of the engine would not normally be replaced as part of a normal service as they are difficult to access but as it was removed from the engine bay everything was much easier to get to. The engine was also painted to enhance the look of it - this paint will also preserve it against corrosion. We carried out an engine oil and oil filter renewal.
One of the most challenging parts of the job was replacing the wiring looms and associated electrical components. It was a ‘spaghetti junction’ of wires that we had to sort out to ensure each wire fed the correct electrical part.
The sub frame was in poor condition so we decided to renew it. Before fitting it was painted in Schutz stone chip to protect it from the elements. Onto this sub frame we fitted new suspension and shock absorbers.
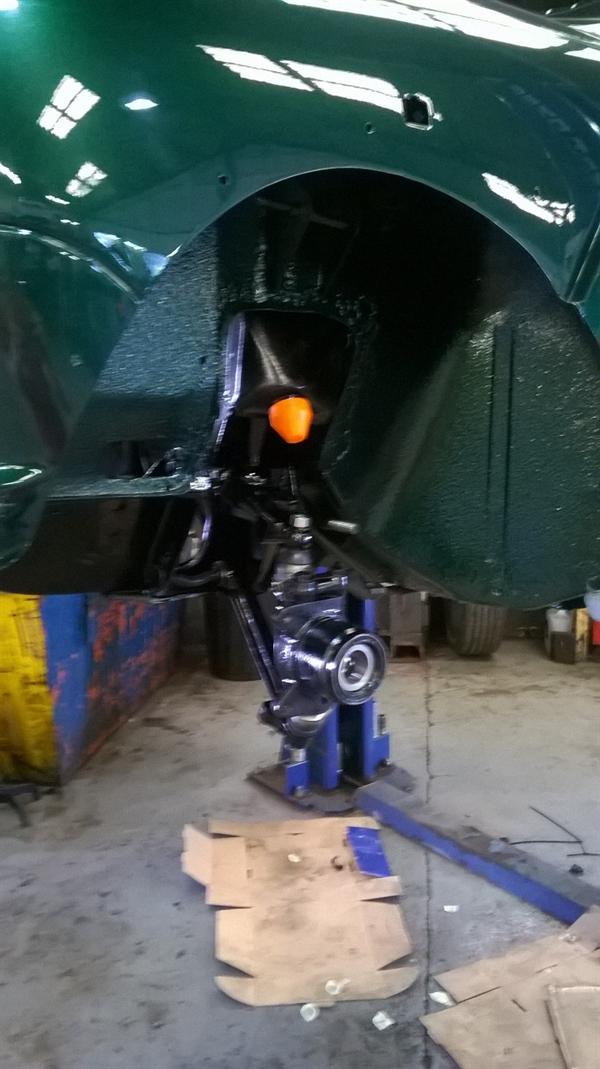
We fitted new polyurethane bushes which last far longer than the standard rubber bushes. Due to the high cost of the new radius arms we overhauled the original arms but we replaced the worn bearings and bushes. New front upper and lower ball joints were replaced.
Most of the braking components were either badly corroded or starting to corrode. We decided to clean up the existing front brake discs but we replaced the front brake pads. One of the calipers was seized so this caliper was replaced.The rear brakes were worn so we replaced the brake linings, cylinders and the hand brake cables. The master cylinder was also replaced. The brake pedal box was cleaned, greased up, painted and reused along with the brake servo.
Some of the original steel brake pipes were in good condition so were reused. We replaced the ones that we could see corrosion setting in.
All 4 wheels were in an okay condition but were starting to deteriorate so we had them all refurbished and put on a new set of tyres. All the center caps and wheel nuts were renewed.
The walnut dashboard veneer was in poor condition and splitting. Before ordering a new dash board we asked the customer whether it was acceptable to replace it with a new dash board. To enhance the interior it was decided to replace it. It took a while to install as all the dials had to be transferred across from the original one to the new one.
Once installed the whole interior just came togther perfectly and looked superb.
The original exhaust system was replaced with a new stainless steel exhaust
All the work listed above is a fraction of the work we carried out on the car - it is a huge task to restore a Mini Cooper as this year of Mini has the more modern engine fitted along with the associated modern safety features. But every member of staff at Wolds View Garage was involved with the project and enjoyed the whole restoration process.
We delivered the Mini back to the customers house and it drove superbly - the amount of work, effort and detail that went into this project was immense but it was all worth it as the end result was fantastic
- ©2025 Wolds View Garage, Pocklington, York YO42 2DG
- Tel: 01759 307770
- Contact us